Learn how to add expenditures to your tasks to track your overall expenses more accurately.
Adding expenditures to your tasks help to track overall expenses and how you will budget in the future. You can add any related expenditures when creating or completing a task.
Adding an Expenditure While Creating a Task

- Begin creating the task. See the creating a task article for additional help.
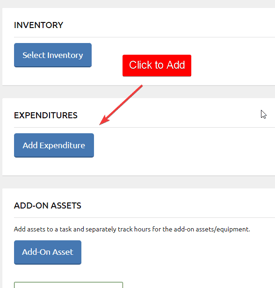
- Find the Expenditures section.
- Click the blue Add Expenditure button.

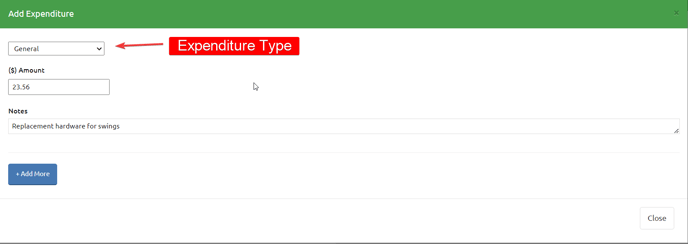
- Select the expenditure type.*
- Enter the amount of the expenditure.
- Add any other relevant notes.
- Press the blue +Add More button and repeat the process to add another expenditure.
- Press the Close button after all expenditures are recorded.
*The system defaults has one expenditure type--General. You can add as many expenditure types as you want. See how to add more expenditure types below.
Adding an Expenditure While Completing a Task
- Select the task related to the expenditure.
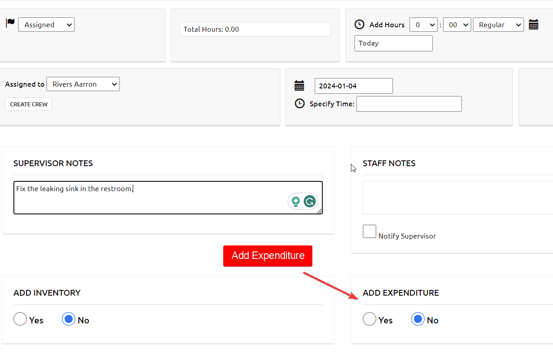
- Toward the bottom right of the dialogue box, there is an Add Expenditure section.

- Click the Yes circle to add an expenditure.
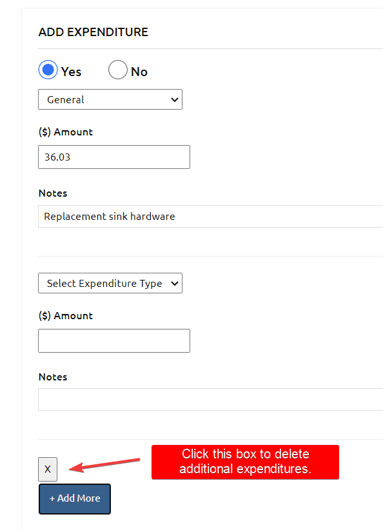
- Select the expenditure type.*
- Enter the amount of the expenditure.
- Add any other relevant notes.
- Press the blue +Add More button and repeat the process to add another expenditure.

- Click the orange Save! button to update the entire task.
Adding New Expenditure Types
System administrators can add new expenditure types to help categorize expenditures.
- Go to the Setup menu.
- Choose Expenditure Types.
- Click the blue Create New Expenditure Type button.
- Give the type a name and add any relevant notes.
Removing Expenditure Types
- Go to the Setup menu.
- Click on the type you want to remove from the expenditure types list.
- Change the status to Inactive.
- Select Update Expenditure Type.
You can always change the expenditure type back to active if you want to start using it again.
